Many people face a “CMOS Checksum Error” when starting their computer. It usually shows up on a black screen right after pressing the power button. The system may beep, or the BIOS might load default settings on its own. This problem can stop the boot process or reset your date and time again and again.
Let’s walk through what it means, why it happens, and what you can do to fix it—step by step. The goal is simple: get your computer working like normal again.
What Is a CMOS Checksum Error?
 CMOS stands for Complementary Metal-Oxide Semiconductor. It stores your BIOS settings. The BIOS is a chip on your motherboard that runs when you turn on your computer. It controls things like boot order, system clock, and hardware settings.
A “checksum” is a value that helps verify if your settings are correct. If the checksum doesn’t match the saved data, the system throws an error. It means your settings were lost, changed, or corrupted.
Common signs include:
- Black screen with an error message
- System clock reset to a past year
- Loss of custom BIOS settings
Why Does This Error Happen?
There are several reasons. Some are simple. Others might need more care.
- Weak CMOS Battery: A dead or dying CR2032 battery can’t keep BIOS settings saved.
- Power Loss: Sudden shutdowns or surges can corrupt CMOS memory.
- BIOS Corruption: A failed update or malware can damage BIOS files.
- Faulty Motherboard: In rare cases, the chip itself may fail.
- Manual Changes: Incorrect BIOS changes might break the checksum.
How to Identify the Error
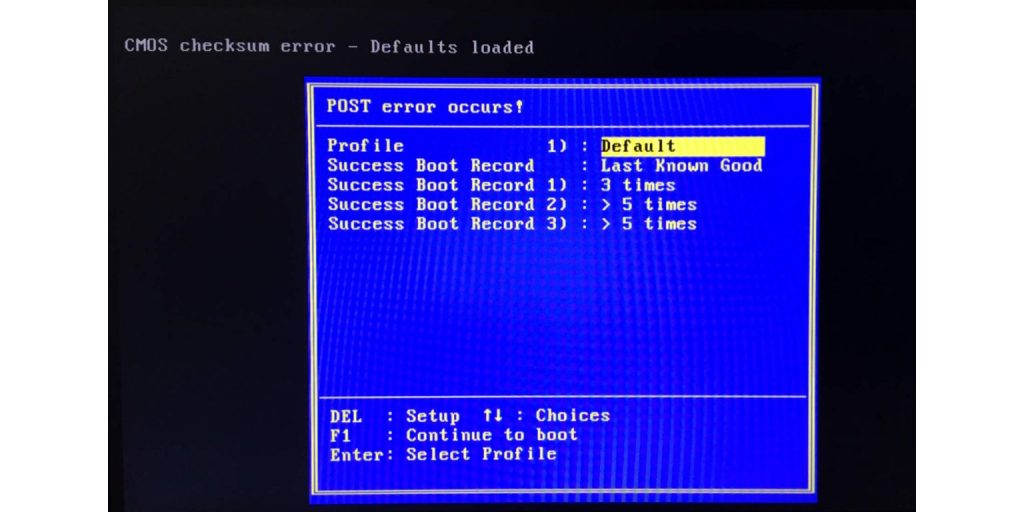
When your computer shows a CMOS checksum error, it typically appears during the initial boot phase, right after pressing the power button. You might see a plain black screen with white text showing messages like “CMOS Checksum Error – Defaults Loaded” or “CMOS Checksum Bad.” Some systems display “BIOS ROM checksum error,” which means the BIOS settings stored in the CMOS don’t match the expected values.
In many cases, the system will freeze on this screen or pause until you press a specific key, often F1 to continue or DEL to enter the BIOS setup. You might also hear a beep sound—either a single beep or a sequence. These audio signals are part of the POST process and serve as error indicators. Each variation can signal different types of problems related to BIOS configuration, battery failure, or corrupted firmware data.
This type of error typically means that the CMOS chip failed to retain settings, often due to a weak battery or improper shutdown. Identifying it quickly helps prevent future issues like incorrect system time, lost BIOS preferences, or failure to boot into the operating system.
Fixing the CMOS Checksum Error
Try these one by one. Start with the easiest.
1. Replace the CMOS Battery
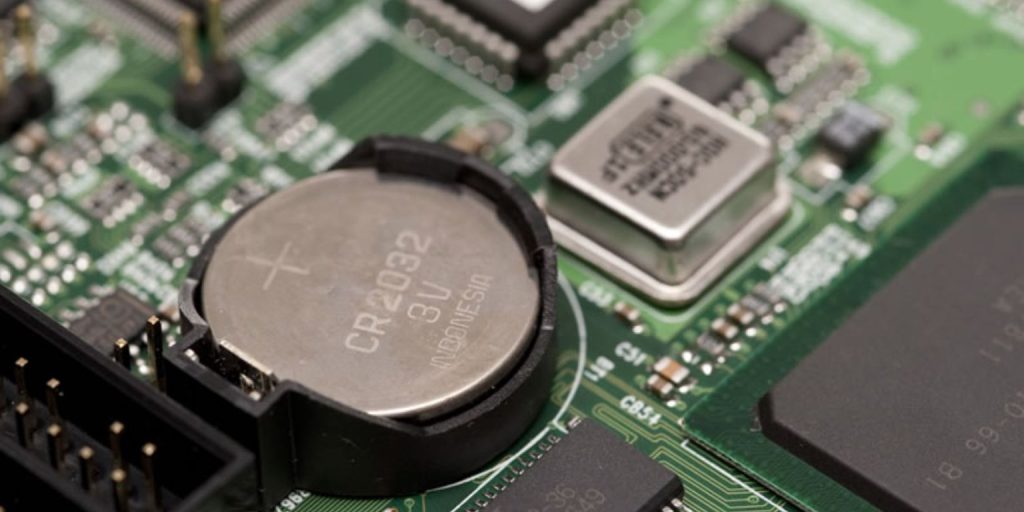 The CMOS battery (CR2032) powers the memory chip on the motherboard. When it dies, the system can’t save settings.
- Power off your PC and unplug it.
- Open the case and locate the silver coin-shaped battery.
- Use a small, flat tool to pop it out.
- Insert a new CR2032 battery.
- Reboot the computer.
2. Load BIOS Default Settings
Sometimes, settings get scrambled. Loading the default BIOS setup can help.
- Restart the PC.
- Press DEL, F2, or the shown key to enter BIOS.
- Look for “Load Setup Defaults” or “Reset to Defaults.”
- Save and exit BIOS.
3. Clear CMOS Using Jumper
Some motherboards have a clear CMOS jumper.
- Turn off and unplug the PC.
- Find the 3-pin CMOS jumper near the battery.
- Move the jumper from pins 1–2 to pins 2–3 for 10 seconds.
- Put it back on pins 1–2.
- Power on the PC.
4. Flash or Update BIOS
If your BIOS firmware is corrupted or outdated, flashing a new version might fix the error.
Warning: This step is risky. Do it only if other steps fail.
- Visit your motherboard manufacturer’s website.
- Download the correct BIOS file for your model.
- Follow the official update steps (usually via USB or special utility).
5. Check for Hardware Damage
If the battery is new, but the settings still reset, the motherboard may be faulty. Check for broken pins, burnt parts, or blown capacitors near the CMOS area. Make sure the battery holder is clean and tight. If the issue continues, contact a technician.
Tips to Prevent It Next Time
Here are some simple tips you can follow to avoid seeing the CMOS checksum error again in the future.
- Replace the CMOS battery every 4–5 years.
- Use a UPS (uninterruptible power supply) to avoid sudden shutdowns.
- Avoid risky BIOS updates.
- Do not change BIOS settings unless needed.
- Keep your system clock correct.
When to Call a Technician
Call a technician if the CMOS checksum error returns after replacing the battery, resetting the BIOS, or updating the firmware.
If your BIOS doesn’t open or the PC shuts down instantly after power-on, it may signal deeper hardware faults.
Visible damage like burnt components or broken traces on the motherboard also needs expert attention.
In rare cases, replacing the BIOS chip or entire motherboard is the only fix.
Quick Fix Checklist:
- Did you replace the CMOS battery?
- Did you reset the BIOS settings?
- Did you clear the CMOS via jumper?
- Did you update the BIOS safely?
- Did you check for hardware problems?
If yes to all, and it still fails, it’s time for expert help.
Final Thoughts
Did any of these steps work for you? Let others know in the comments. Share the post if you think it could help a friend or someone stuck with the same error.
You might save someone a lot of trouble.
