People change their Facebook names for many reasons. Some fix a typo, others switch to a married name, and some prefer using a nickname or simplified version of their full name. Whatever the reason, Facebook allows you to update your name—if you follow its rules.
This guide explains how to change your name using Facebook’s desktop website or mobile app, what rules apply, and what to expect after the change.
Facebook’s Rules for Changing Your Name
Before you update your name, Facebook expects you to follow a few basic rules:
- You must use the name you go by in real life
- Facebook doesn’t allow fake names or impersonation
- Don’t include titles (like Dr. or Prof.), symbols, numbers, or punctuation
- You can only change your name once every 60 days
- Nicknames are allowed if they resemble your real name
- Facebook may ask for ID if the name triggers a review
If your name doesn’t follow the guidelines, Facebook might reject it during the update process.
How to Change Your Name on Facebook (Desktop)
To change your name using a browser on a computer:
- Log in to your Facebook account
- Click your profile photo in the top right
- Select Settings & privacy, then choose Settings
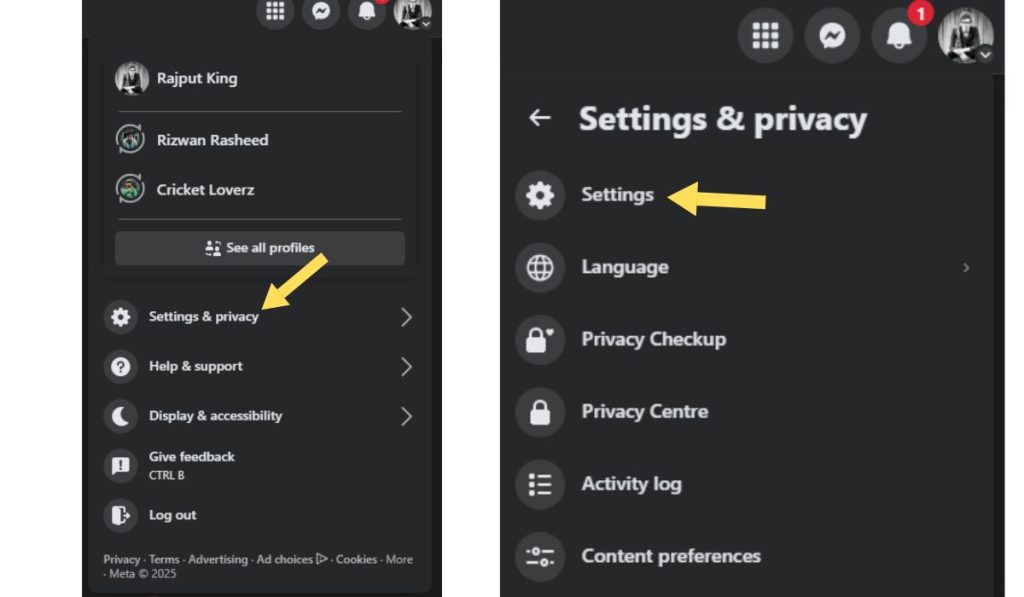
- Under the Account Center, select Personal details
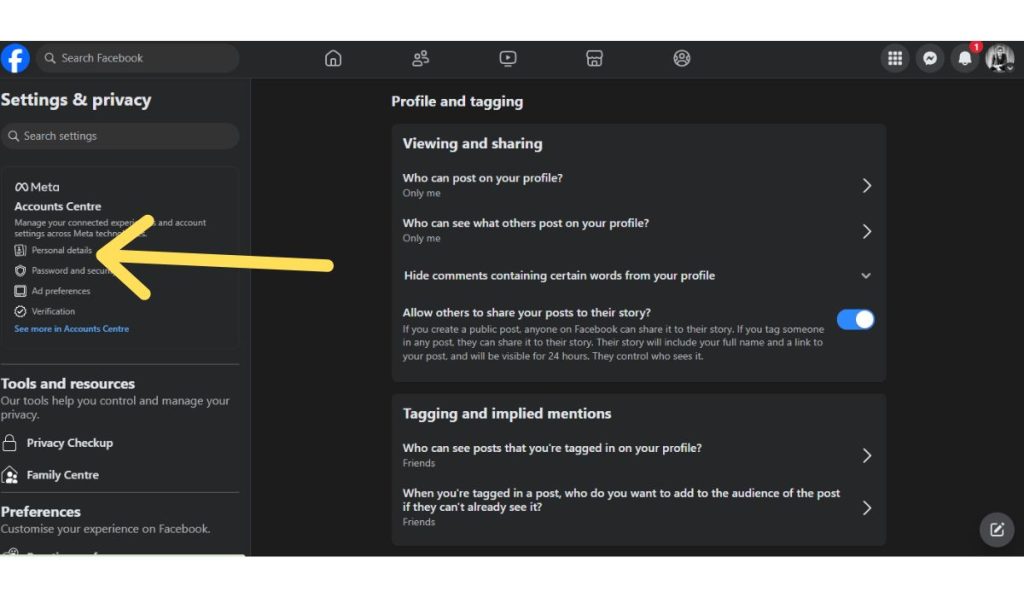
- Click Name
- Type your new first, middle, or last name
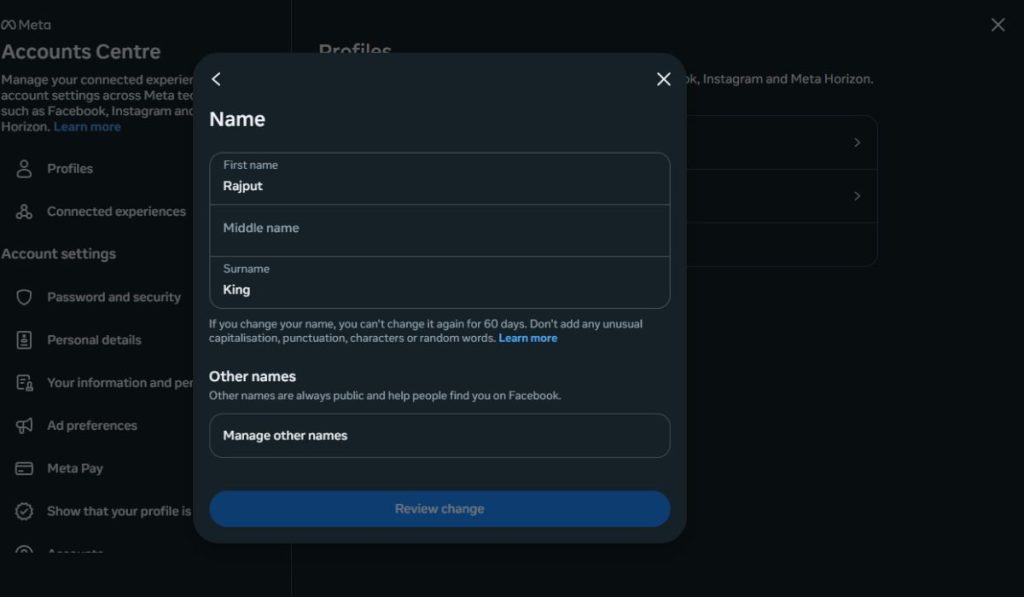
- Click Review change
- Enter your password to confirm
Once confirmed, your name will update immediately or after review.
How to Change Your Name Using the Facebook Mobile App
If you’re using the Facebook app on a phone or tablet, follow these steps:
- Open the Facebook app
- Tap the menu icon (three horizontal lines)
- Scroll down and tap Settings & Privacy
- Tap Settings
- Under Account Center, tap Personal details
- Tap Name
- Enter your new name
- Tap Review change, then enter your password to submit
The new name should appear on your profile soon after.
How Long Does the Name Change Take?
Most name changes go through instantly. In some cases, Facebook may review the request before approving it. Reviews typically take less than 24 hours. If the name doesn’t follow Facebook’s guidelines, you may receive a rejection or be asked to verify your identity.
What Happens After You Change Your Name?
Once Facebook approves the change:
- Your new name appears across your profile and timeline
- Friends will see the updated name in chats and comments
- Some people may still find you by your old name for a short time
- You cannot change your name again for the next 60 days
- All past posts and interactions will now show your updated name
Things to Keep in Mind
Facebook uses your real name to help people find you. Avoid using fake names, titles, or excessive styling. If you change your name too often, Facebook may lock your account until you verify your identity with a government-issued ID.
This process follows a different one if you’re trying to rename a business page or create a username (like facebook.com/yourname).
Conclusion
Changing your name on Facebook is easy if you follow the platform’s rules. Use your real name, update it only when necessary, and be ready to confirm your identity if Facebook asks. Whether you’re rebranding or correcting a typo, you now know how to update your Facebook name in just a few minutes.
If you’ve changed your name recently or faced issues with the process, share your experience in the comments. It may help someone else trying to do the same.
