If you stream or record gameplay, you don’t always want to save the entire session. Sometimes you just want that one perfect moment. That’s where Replay Buffer in OBS Studio helps. It lets you save the last few seconds of gameplay without recording everything. Many streamers on Twitch and YouTube Live use it for quick highlights.
In this guide, you’ll learn what Replay Buffer does, how to turn it on, how to set a hotkey, and how to optimize it properly.
What Is Replay Buffer in OBS Studio?
 Replay Buffer in OBS Studio stores a short amount of recent video in your system memory. Instead of saving a full recording file, OBS keeps the last few seconds in RAM. When you press a hotkey, OBS saves that buffered video as a clip to your recording path. This works using your selected encoder such as NVENC for NVIDIA GPUs, AMD encoder, or x264 for CPU encoding. Because it only saves recent footage, it uses less storage than full-time recording. Gamers often use it to capture highlights without filling their SSD with long video files. The feature depends on RAM allocation and encoder stability, so proper configuration matters.
You can find Replay Buffer inside OBS Settings under Output when Output Mode is set to Advanced. It also appears in the Controls panel once enabled.
Requirements Before Turning On Replay Buffer
Before enabling Replay Buffer, check your system to avoid performance drops.
- OBS Studio updated to the latest version
- At least 8GB RAM recommended
- Advanced Output Mode enabled
- Recording path selected
- Stable encoder setup such as NVENC or x264
If your system struggles with recording, adjust settings first.
How to Turn On Replay Buffer in OBS Studio?
Follow these simple steps to enable Replay Buffer on Windows or macOS.
- Open OBS Studio.
- Click on Settings.
- Go to the Output tab.
- Change Output Mode to Advanced.
- Select the Replay Buffer tab.
- Check Enable Replay Buffer.
- Set the Maximum Replay Time, such as 30 seconds.
- Click Apply and then OK.
After enabling it, click Start Replay Buffer from the Controls panel. The feature does not activate automatically until you start it.
How to Set a Hotkey for Replay Buffer?
To save clips instantly, assign a keyboard shortcut.
Follow the steps below to easily set a hotkey.
- Open Settings in OBS.
- Click on the Hotkeys tab.
- Scroll to Save Replay Buffer.
- Enter your preferred key combination.
- Click Apply.
Now, whenever something exciting happens, press the hotkey and OBS will save the recent clip.
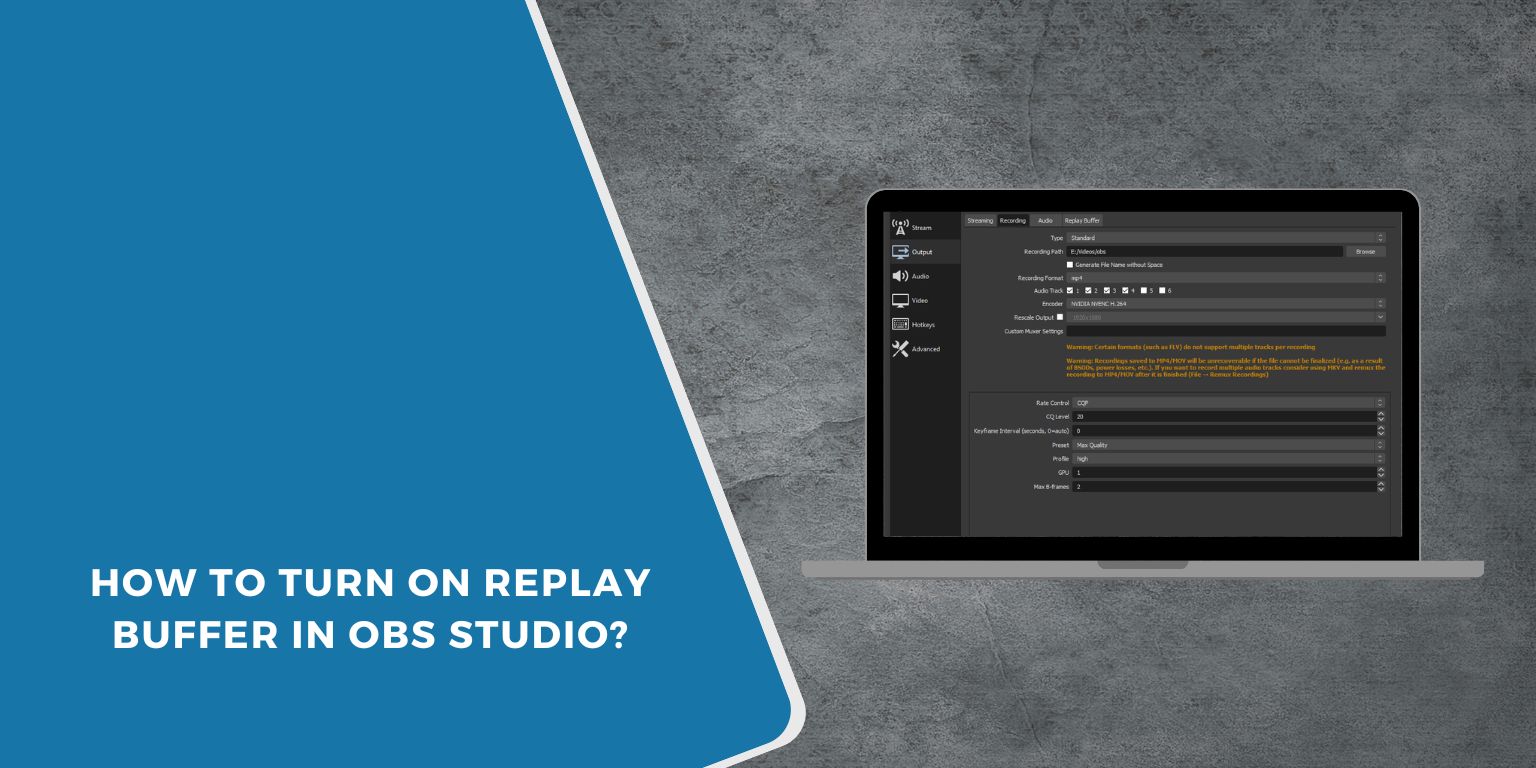
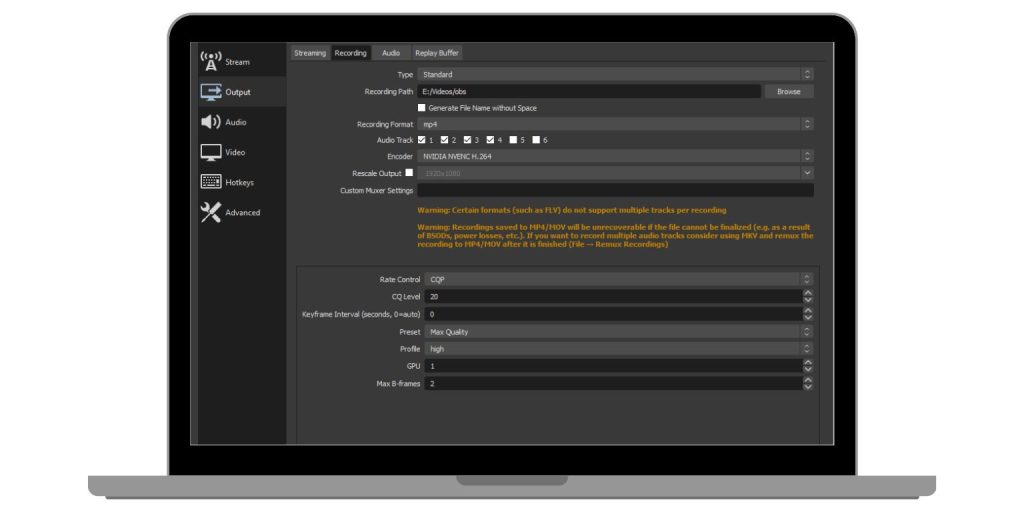
Where Are Replay Buffer Files Saved?
Replay files save in the same folder used for normal recordings. You can check this by opening Settings, then Output, and then the Recording tab. Look at the Recording Path location. OBS saves the replay clip in the selected video format such as MKV or MP4. Using an SSD is recommended because faster storage improves file writing speed. If you cannot find your clips, verify the correct recording directory.
Tips to Optimize Replay Buffer Performance
Replay Buffer uses RAM and encoder resources. Adjusting settings helps prevent lag or dropped frames.
- Set replay time between 20 and 60 seconds
- Use hardware encoder like NVENC if available
- Avoid extremely high video bitrate
- Store recordings on an SSD
- Close unnecessary background applications
- Monitor CPU and GPU usage inside OBS
Balanced settings keep your stream smooth.
Conclusion
Replay Buffer in OBS Studio allows you to save recent gameplay without recording the entire session. It works by storing video in RAM and saving it when triggered by a hotkey. You simply enable Advanced Output Mode, activate Replay Buffer, and set a shortcut key. With the right encoder and memory settings, it runs smoothly on both Windows and macOS.
Before going live, test your replay settings to ensure stable performance. If you found this guide helpful, share it with other streamers and leave a comment about how you use Replay Buffer in your setup.
