
Whether you’re working on a home improvement project, sewing, crafting, or simply doing everyday measurements, knowing how to read a ruler is a fundamental skill. Yet, many people find rulers confusing due to their different units of measurement—namely inches and centimeters. This guide offers a clear, serious, and precise explanation of how to read a ruler correctly in both imperial and metric systems.
TL;DR (Too Long; Didn’t Read)
To read a ruler, begin by identifying whether it’s marked in inches, centimeters, or both. Inches are typically divided into fractions (like 1/2, 1/4, 1/8, and 1/16), while centimeters are divided into ten smaller units called millimeters. Understanding how to interpret each line on the ruler will help you measure accurately. Practice makes perfect, so familiarize yourself with both systems for versatile measuring capabilities.
Understanding the Basics of a Ruler
Most rulers are either 12 inches (1 foot) or 30 centimeters (commonly found in metric systems) in length. Some rulers display both inches and centimeters, making them dual-purpose tools. Understanding which system you’re using is your first step before taking any measurement.
Here’s how to identify what kind of ruler you have:
- Imperial Ruler: Marked with “in,” showing measurements in inches. Each inch is subdivided into smaller fractions.
- Metric Ruler: Marked with “cm” and “mm,” showing centimeters and millimeters. Each centimeter equals 10 millimeters.
- Dual-Sided Ruler: One side shows inches while the other shows centimeters.
How to Read a Ruler in Inches
In the imperial system, each ruler usually divides the inch into a series of fractional segments. These segments vary depending on the ruler’s precision, most commonly broken into halves, quarters, eighths, or sixteenths of an inch.
1. Understand the Line Divisions
- 1/2 inch: This is the longest line between any two inch marks, dividing the inch in half.
- 1/4 inch: Shorter lines that divide the inch into four equal parts.
- 1/8 inch: Even smaller lines, dividing the inch into eight parts.
- 1/16 inch: The smallest common division, with 16 equally spaced lines per inch.
To read a measurement accurately:
- Locate the nearest full inch to the left of your endpoint.
- Count the number of fractional lines beyond that inch.
- Match the length with the correct fraction.
2. Common Pitfalls in Reading Inches
People often misidentify the smallest lines between inch marks. For instance, a 1/8 inch division can easily be confused with 1/16 if not carefully counted. Always start from the left and count the divisions methodically. Take note: not all rulers include 1/16 divisions—some may only go as far as 1/8 or 1/4.
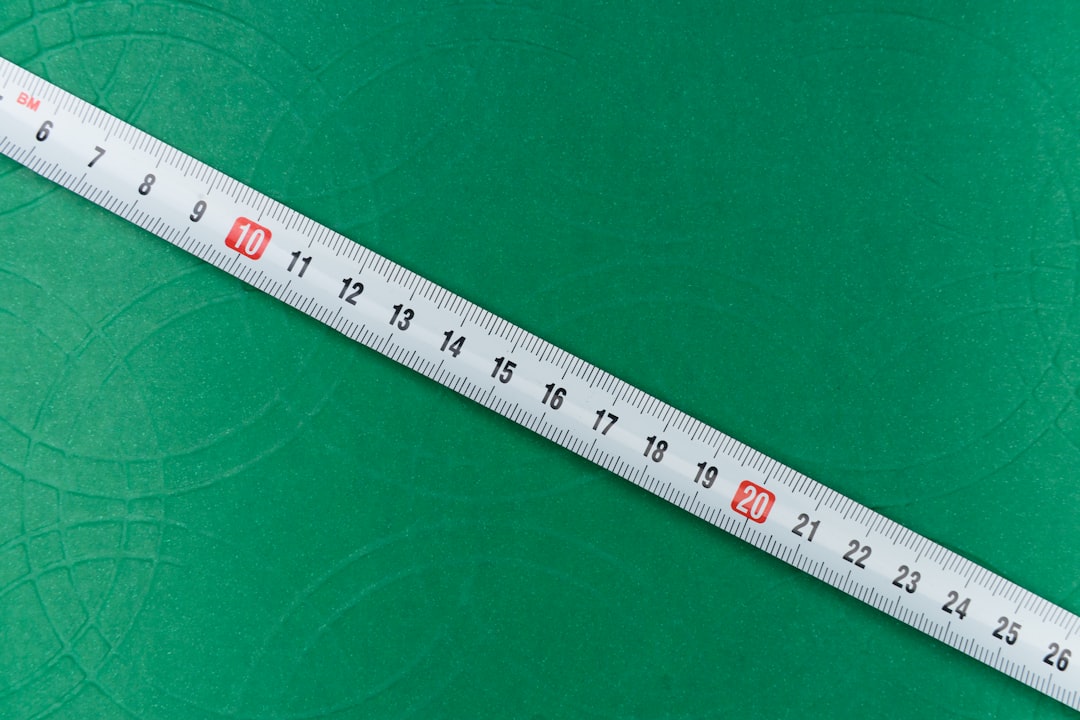
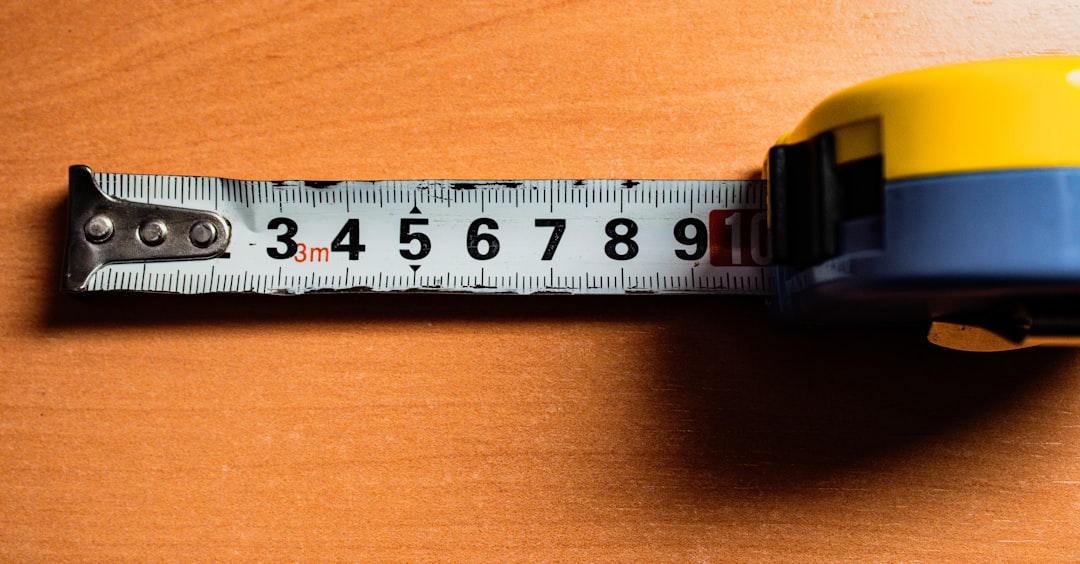
How to Read a Ruler in Centimeters
Reading measurements in the metric system is generally easier because it works in base 10. One centimeter (cm) equals 10 millimeters (mm). Most metric rulers are marked from 0 up to 30 centimeters, with smaller lines in between for millimeters.
1. Identify the Key Markings
- Centimeter Marks: These are usually the longest lines and are numbered.
- Millimeter Marks: These are shorter lines between the centimeter lines. There are 9 millimeter lines between each centimeter number.
To read a metric measurement:
- Count the number of full centimeters from the zero mark.
- Add the number of millimeter lines from the last centimeter mark to your point of reference.
- Combine the two numbers. For example, “4 cm and 7 mm” becomes 4.7 cm.
2. Advantages of the Metric System
Unlike the imperial system, which uses fractions, the metric system uses decimals. This makes calculations, conversions, and readings faster and more intuitive. It is widely used in scientific, academic, and professional contexts for this reason.
Using a Dual-Sided Ruler
Many tools and notebooks contain dual-sided rulers. If this applies to your situation:
- Identify which side represents inches and which represents centimeters.
- Use the appropriate side based on your project’s requirement.
- Do not confuse millimeter lines for inch divisions—they are more frequent and closer together.
Practical Tips for Accurate Measuring
Now that you understand both systems, here are a few professional tips to ensure you measure accurately every time:
- Always start at zero: Avoid using the edge of the ruler if it’s worn or rounded. The ‘0’ mark on the ruler is your real starting point.
- Place the ruler flat: Ensure it’s level and aligned with the surface or item you are measuring.
- Use good lighting: Proper lighting helps you see small markings, especially for 1/16-inch readings.
- Double-check: Always remeasure if precision is critical—especially in carpentry, tailoring, or scientific work.
Conversion Between Inches and Centimeters
For projects involving international specifications, you may need to convert between the two units:
- 1 inch = 2.54 centimeters
- 1 centimeter = 0.3937 inches
Using a calculator or a conversion app can make this process faster. However, if you’re regularly working in both systems, it’s helpful to memorize these basic conversions.
When Should You Use Inches vs. Centimeters?
The choice of measurement system often depends on regional preferences and industry standards:
- Use Inches: In countries like the United States where imperial measurements are standard, or for home improvement tasks such as measuring wood, drywall, or furniture.
- Use Centimeters: In countries using the metric system (which is most of the world), or in fields like science, engineering, and textiles where decimal precision is key.

Practice Makes Perfect
The best way to get comfortable with rulers is to practice. Take a ruler and measure items around your home or workspace. Try converting measurements from inches to centimeters and vice versa. Challenge yourself to determine fractional measurements and verify your readings using a calculator.
Conclusion
Reading a ruler accurately—whether in inches or centimeters—is a basic but essential skill with wide applications. Understanding the subdivisions, reading each line carefully, and practicing regularly will help you measure confidently and precisely. Whether you are fitting shelves, tailoring garments, or working on a DIY project, this vital tool will guide your measurements to success every time.
